Introduction
Welcome to the DevOps Library! This is Samantha, and in this episode, we're going to take a look at the Jenkins Pipeline plugin. A Jenkins pipeline allows you to define an entire application life cycle as code. In most cases, you'll want to use this plugin for implementing continuous delivery.
Benefits
One huge benefit of using a pipeline is that the job itself is durable. A Pipeline job is able to survive planned or even unplanned restarts of the Jenkins master. If you need to survive slave failures as well, you’ll have to use checkpoints.
Unfortunately, the checkpoints plugin is only available for the enterprise edition of Jenkins. Pipelines are also pausable. You can use an "input" step to wait for human input or approval before continuing the job.
They're also versatile and extensible. You can set up pipelines that fork, join, loop, and even execute items in parallel. You can also use custom groovy to extend the Pipeline DSL.
Pipeline Vocabulary
Alright, it's time to cover some pipeline vocabulary. Each pipeline generally consists of three things: Steps, Nodes, and Stages.
A step, also known as a "build step", is a single task that we want Jenkins to execute.
A “node”, within the contexts of a pipeline, refers to a step that does two things. First, it schedules the defined steps so that it'll run as soon as an executor is available. Second, it creates a temporary workspace which is removed once all steps have completed.
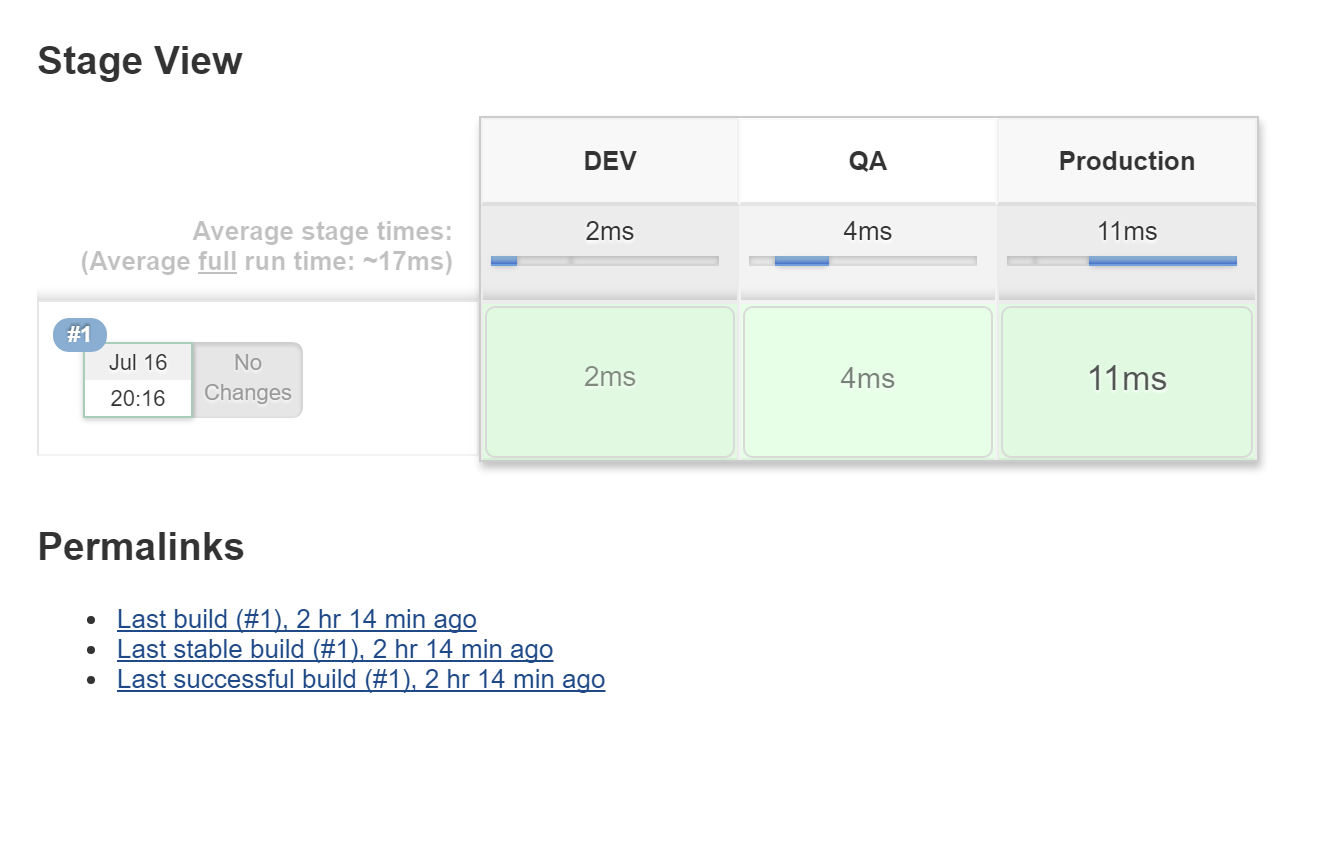
And lastly, we have "Stages". Stages are for setting up logical divisions within pipelines. The Jenkins Pipeline visualization plugin will display each stage as a separate segment. Because of this, teams tend to name stages for each phase of the development process, such as "Dev, Test, Stage, and Production".
Setting up a Pipeline
Alright, let's go ahead and set up a Pipeline ourselves! On your Jenkins master, select "New Item". For the type, choose Pipeline, and name it whatever you'd like and hit ok. Now scroll down to the Pipeline definition. At this point, you can select "Pipeline script", or "Pipeline script from SCM".
While the pipeline is going to look the same either way, if you select "from SCM", Jenkins will look for a "Jenkinsfile" within your repository. The advantage of storing the script in a "Jenkinsfile" is that you'll be able to version control your "Pipeline as Code".
For now, let's choose "Pipeline as Script", that way we don't have to worry about setting up a repository.
Alright, now onto the script itself. Let's go ahead and click the "try sample Pipeline" box. Next, choose "hello world". Perfect, that should be enough to get us started, but let's change the stages a bit. For the two listed, rename them to DEV, and QA, then add a third stage named "Production".
Snippet Generator
I know we're only echoing out a few messages in this tutorial, but you can
always use the snippet generator to help you write more complex pipelines.
Let's take a quick look at it.
Under "Sample Step", click the drop down and look at all our options. Select "Build a job", type in the name of a project to build, and finally select "Generate Groovy".
See? Now we know exactly what we'd need to add if we wanted to include a build step.
Exam Tip
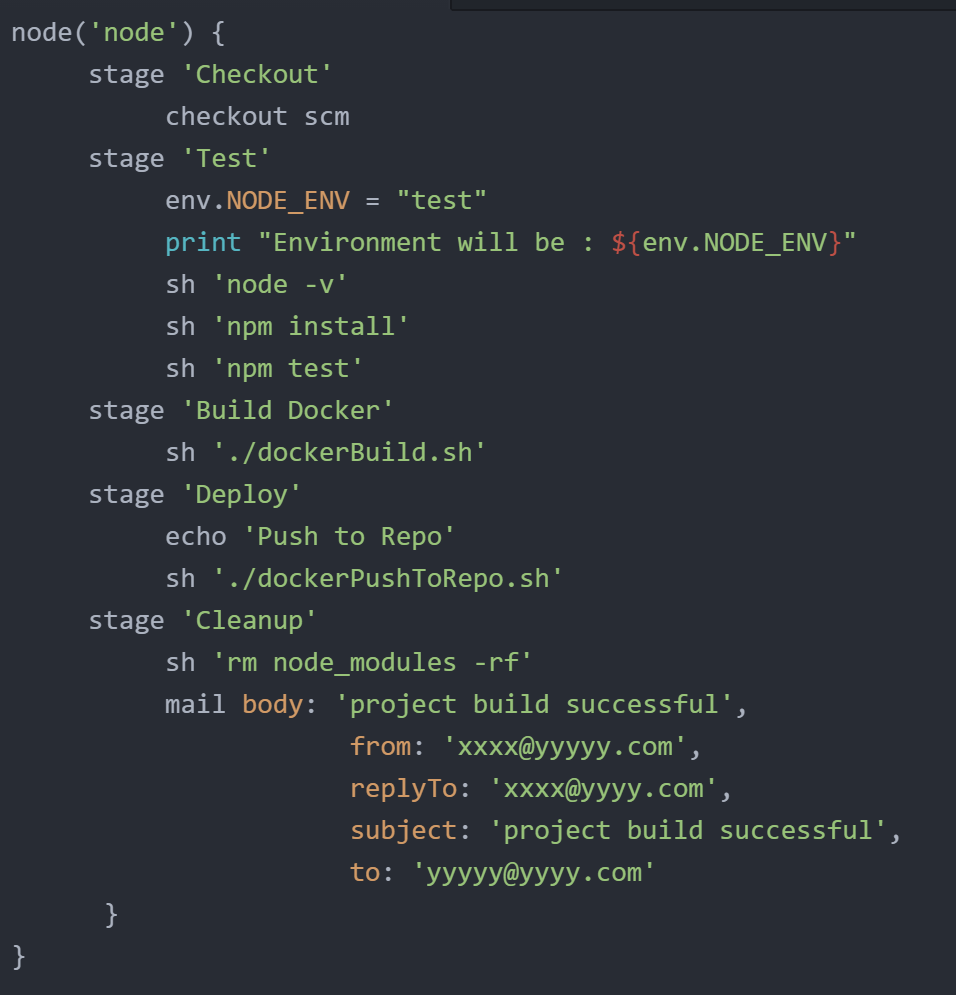
Here’s a quick tip for the CCJPE exam. You don’t need to worry about memorizing each snippet, but you do need to know the term "parallel". By placing steps within a "parallel" section, Jenkins will kick off each step at the same time. Otherwise, Jenkins will wait for each step to finish before starting the next one.
Alright, let's get go ahead and try out our pipeline. Save the job, then on the next page, click "Build Now" to start the Pipeline.
You may have to wait a minute or so for it to finish running, but check out how nice our pipeline looks! Great job!
Conclusion
Well, that's it for our lesson on the Jenkins Pipeline Plugin. If you'd like to learn more, check out the documentation at Jenkins.io. Another good place to look is on the CloudBees blog, we highly recommend reading the articles by Hannah Inman.
Thank you as always for watching! If you like our videos, please subscribe to our YouTube channel!
Thank again and see you soon.